
Nail art is always changing, and one super popular trend right now is brown ombre nails. It’s a cool style that mixes warm brown colors with a gradual blending effect, making your nails look awesome. Whether you like doing your nails at home or prefer going to a salon, brown ombre nails give you lots of ways to show off your style. In this article, we’ll check out the best options for brown ombre nails, from picking the right shade to keeping them looking perfect for different events.
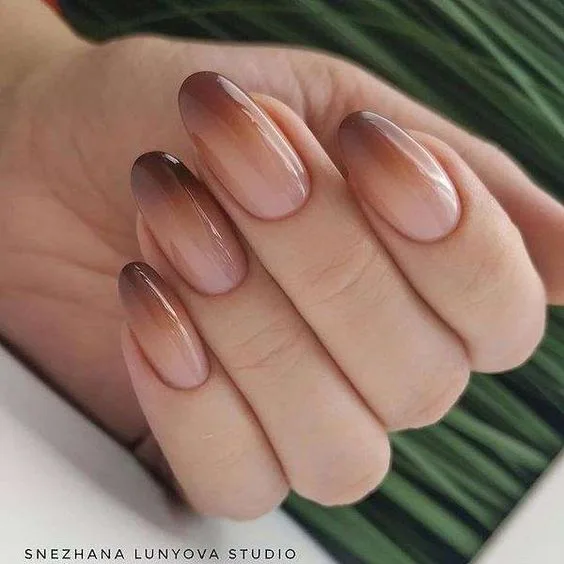
Ombre nails have become a go-to choice for those looking to add a touch of elegance to their manicure. The blending of colors, transitioning from one shade to another, creates a captivating visual effect. Now, imagine incorporating the rich and earthy tones of brown into this popular trend – the result is nothing short of spectacular.
Choosing the Right Shade
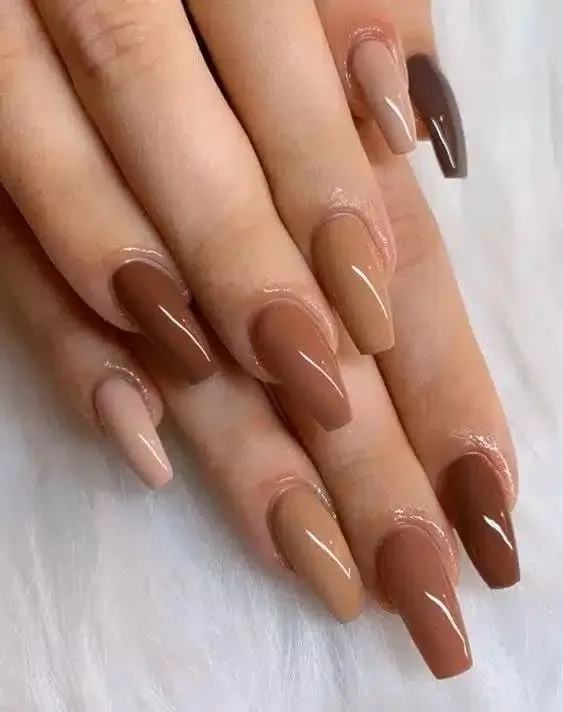
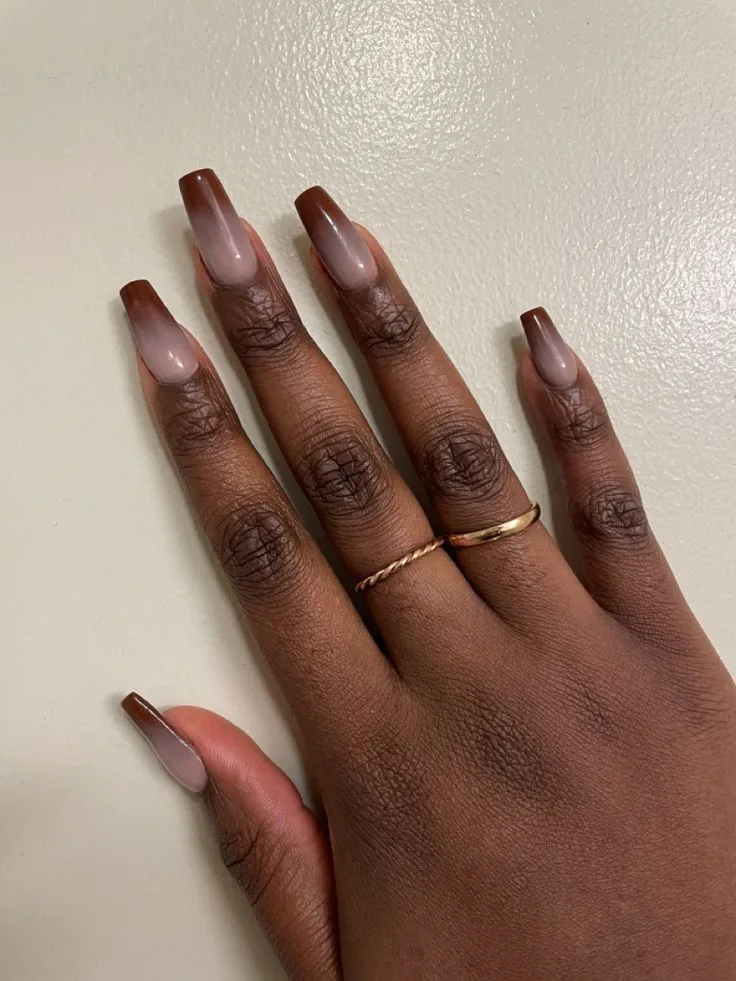
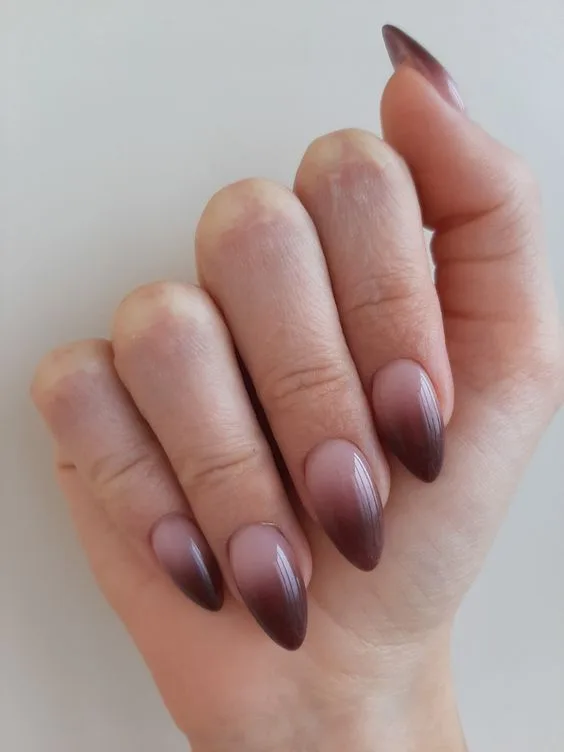
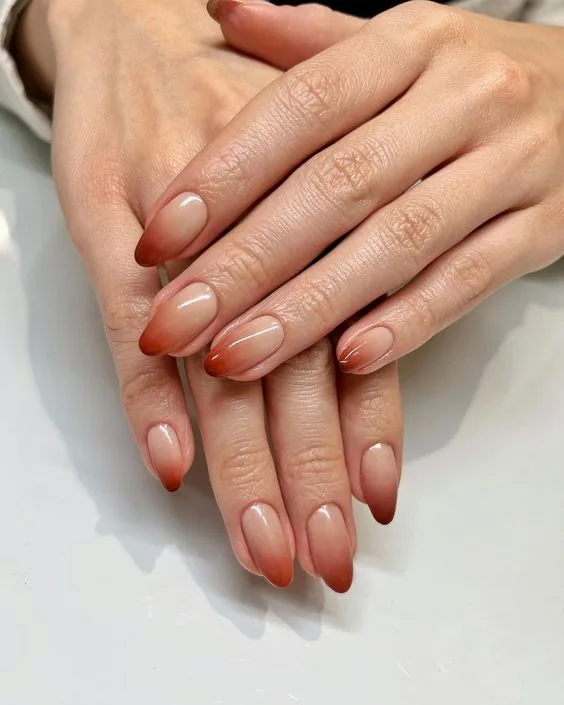
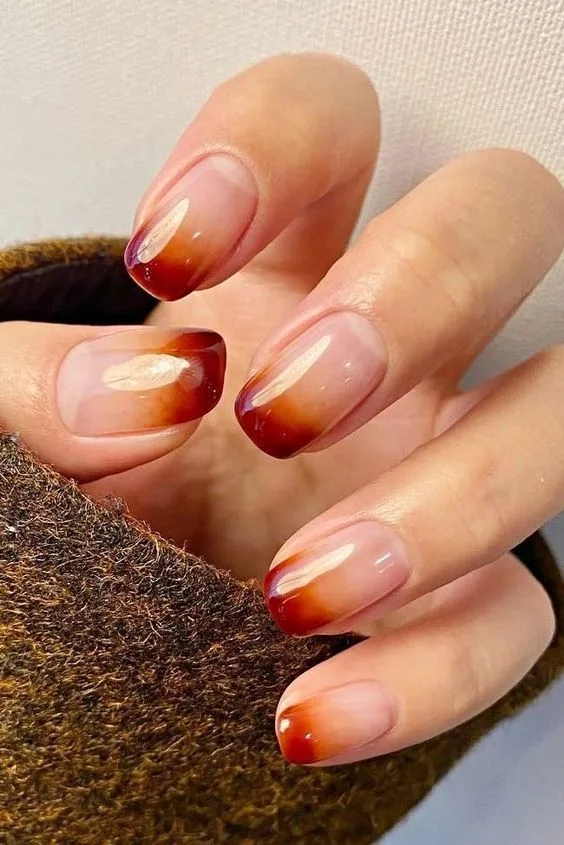
Before you jump into trying out those trendy brown ombre nails, let’s take a moment to explore the wide range of brown shades available. You’ve got your warm caramel, giving off cozy vibes, and then there’s the deep chocolate for a more rich and intense look. Each shade has its unique charm, so it’s like picking your own style adventure.
Related Readings:
25 Best Blue Winter Nails | Classy Winter Nails 2024
19 Neon Orange Nails | Best Summer Nails Design 2024
Now, here’s a cool tip: think about your skin tone when choosing the perfect brown. This way, you’ll ensure that the color not only looks good but also complements your natural tones, giving you that extra touch of fabulousness. So, whether you’re leaning towards the warmth of caramel or the depth of chocolate, make sure it’s a hue that suits you and makes you feel awesome!
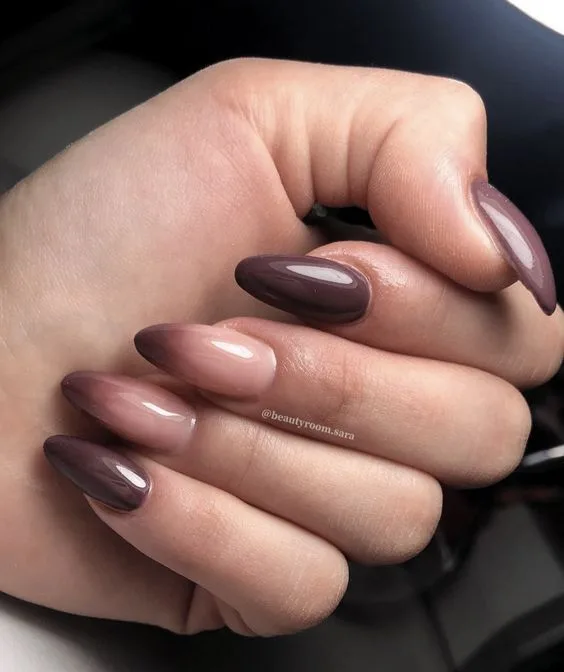
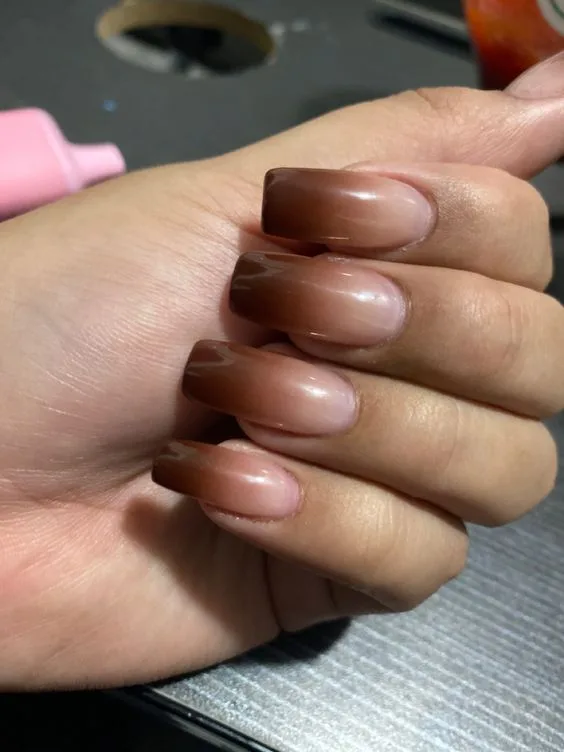
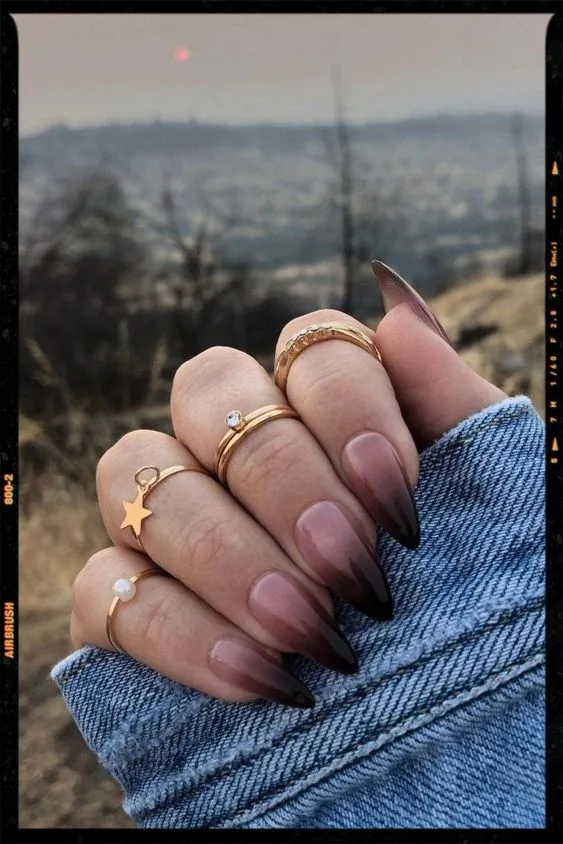
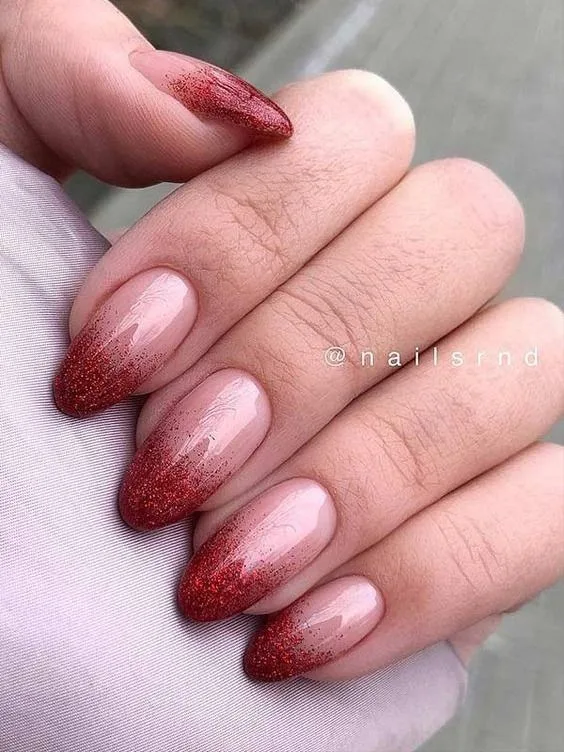
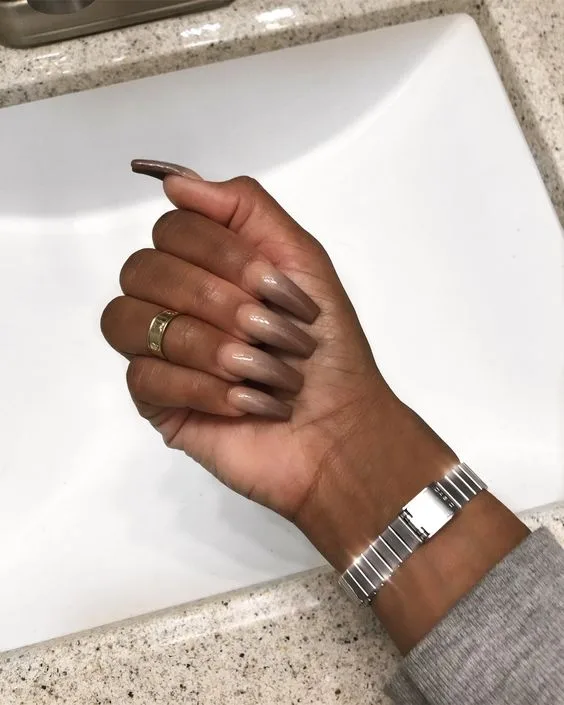
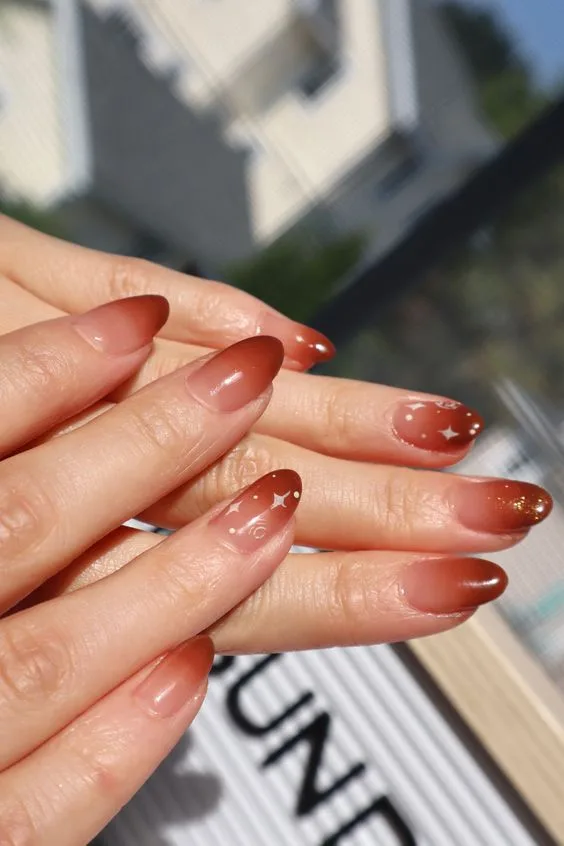
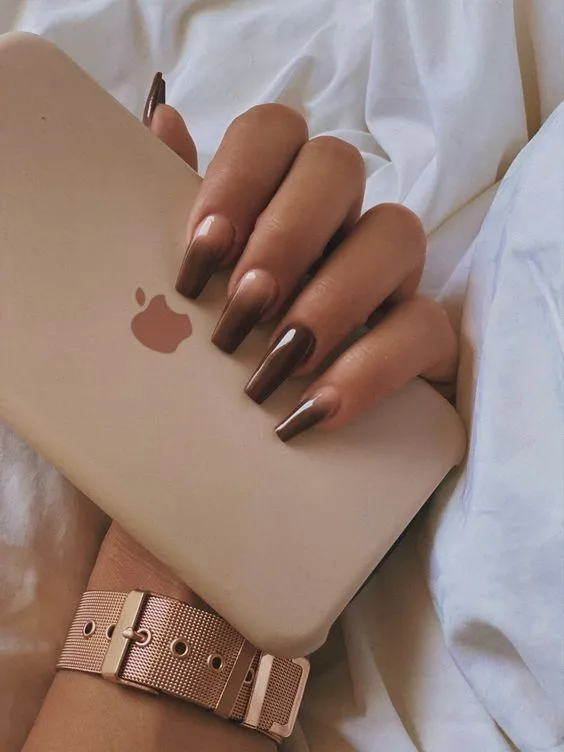
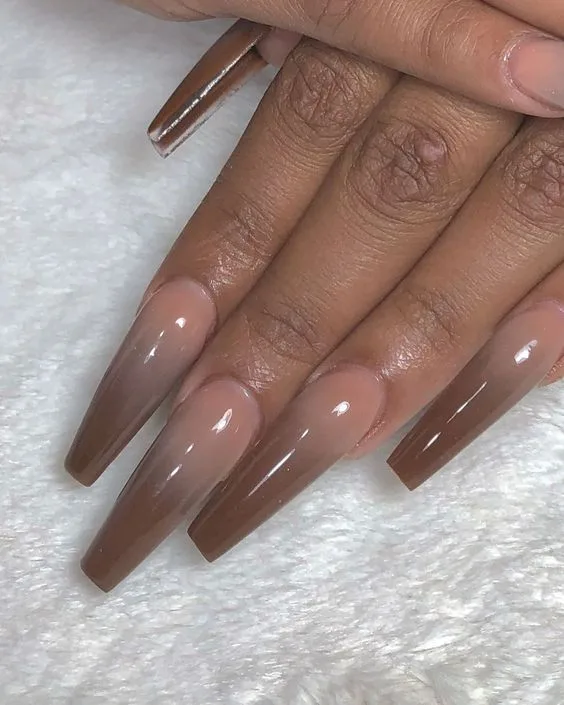
Trendy Brown Ombre Nails
DIY Brown Ombre Nails at home
Creating stunning brown ombre nails at home is a fantastic way to express your creativity and style. Here’s a step-by-step guide to achieving the perfect DIY brown ombre nails:
Materials Needed:
- Brown nail polishes in two or more shades
- Base coat
- Top coat
- Makeup sponge
- Nail polish remover
- Cotton swabs or brushes for cleanup
Step 1: Prepare Your Nails Start with clean, dry nails. Remove any existing nail polish and shape your nails to your liking. Apply a base coat to protect your natural nails and create a smooth surface.
Step 2: Choose Your Brown Shades Select two or more brown nail polish shades that complement each other. You can choose lighter and darker shades for a subtle gradient or mix different tones for a more dramatic effect.
Step 3: Apply the Lightest Shade Paint all your nails with the lightest brown shade as the base color. Allow it to dry completely before moving on to the next step.
Step 4: Prep the Makeup Sponge Cut a small piece of a makeup sponge. Ensure it’s clean and free of any makeup residue. The sponge will be used to create the ombre effect.
Step 5: Apply Nail Polish to the Sponge Apply the two or more chosen brown shades side by side on the makeup sponge. Make sure they slightly overlap in the middle.
Step 6: Sponge onto Nails Gently press the sponge onto your nails, starting from the tips and moving towards the cuticles. Dab the sponge multiple times to build up the gradient effect. Don’t worry if it looks a bit messy; you’ll clean it up later.
Step 7: Repeat for Intensity Repeat steps 5 and 6 for each nail until you achieve the desired ombre intensity. If needed, add more polish to the sponge.
Step 8: Clean Up Use a cotton swab or a small brush dipped in nail polish remover to clean up any excess polish on your skin and cuticles.
Step 9: Apply Top Coat Once the ombre effect is dry and looks just right, apply a top coat to seal in the colors and add shine.
Voila! You’ve successfully created brown ombre nails at home. Experiment with different shades and have fun expressing your style through this trendy nail art technique.
Maintaining Brown Ombre Nails
Keeping your brown ombre nails looking fabulous requires a bit of care and attention. Here’s a guide to help you maintain that gorgeous manicure:
1. Protect Your Nails:
- Avoid using your nails as tools to prevent chipping and breaking.
- Wear gloves while doing household chores or activities that may expose your nails to harsh chemicals or excessive moisture.
2. Moisturize Regularly:
- Keep your cuticles and nails hydrated by applying a moisturizing cuticle oil or cream regularly. This helps prevent dryness and promotes healthy nail growth.
3. Be Gentle on Your Nails:
- Use a non-acetone nail polish remover to avoid drying out your nails.
- When filing your nails, go for a gentle file in one direction to avoid causing damage or weakening the nails.
4. Touch-Up as Needed:
- If you notice any chipping or fading in your ombre design, do quick touch-ups using the same shades. This will keep your manicure looking fresh and vibrant.
5. Avoid Harsh Chemicals:
- Limit exposure to harsh chemicals, such as cleaning products or acetone-based removers, as they can weaken your nails and fade the nail polish.
6. Maintain Nail Health:
- Ensure a balanced diet rich in vitamins and minerals to promote overall nail health. Biotin supplements can also contribute to stronger nails.
7. Schedule Regular Maintenance:
- Plan for regular nail maintenance. This may involve a weekly or bi-weekly routine of trimming, filing, and refreshing your ombre design if needed.
8. Use a Top Coat:
- Apply a top coat every few days to maintain shine and protect the ombre design. This will also help extend the life of your manicure.
9. Be Mindful of Activities:
- Pay attention to activities that might put stress on your nails, such as typing or playing musical instruments. Adjust your habits to minimize potential damage.
10. Enjoy the Journey:
- Embrace the evolving nature of your ombre nails. As the polish naturally wears, it can create a beautiful, lived-in look. If you love it, let it be!
By incorporating these tips into your nail care routine, you’ll keep your brown ombre nails looking stunning for an extended period, allowing you to showcase your stylish and well-maintained manicure.
Incorporating Nail Art with Brown Ombre
Integrating nail art with brown ombre creates endless possibilities for expressing your unique style. Here’s a guide to seamlessly blend nail art with your stunning brown ombre nails:
1. Accent Nails:
- Choose one or two nails on each hand to feature intricate nail art while keeping the rest in the ombre style. This allows for a balanced and visually appealing look.
2. Geometric Designs:
- Add geometric patterns like triangles, stripes, or dots using contrasting colors or metallic accents. These designs can complement the warm tones of your brown ombre.
3. Floral Touch:
- Incorporate delicate floral designs on a couple of nails for a feminine and charming touch. Consider using lighter shades like beige or nude for the flowers to stand out against the brown gradient.
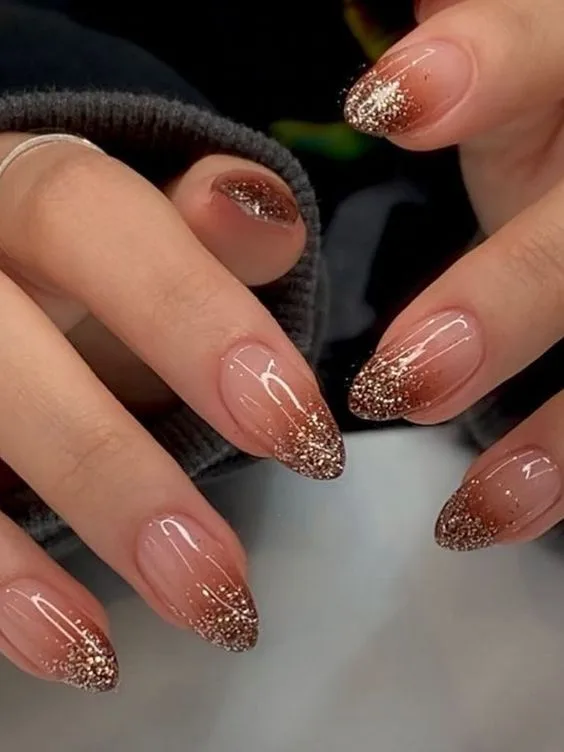
4. Gradient Glitter:
- Enhance your ombre nails with a touch of sparkle by incorporating a glitter gradient. Apply glitter at the tips or near the cuticles to create a seamless transition between the ombre and sparkle.
5. Negative Space Designs:
- Embrace negative space by leaving certain areas of your nails bare, revealing the natural nail. Combine this with geometric shapes or lines for a modern and trendy look.
6. French Tips with a Twist:
- Give the classic French manicure a twist by incorporating brown ombre as the base and adding a contrasting color or metallic line at the tips.
7. Stamping or Decals:
- Utilize nail stamping plates or nail decals to add intricate designs with minimal effort. This is a quick way to achieve detailed patterns that complement your brown ombre nails.
8. Mix Textures:
- Experiment with different textures, such as matte and glossy finishes, to add dimension to your nail art. This can create a dynamic and eye-catching effect.
9. Abstract Art:
- Let your creativity run wild with abstract designs. Play with shapes, lines, and colors to create a one-of-a-kind nail art masterpiece.
10. Seasonal Themes:
- Tailor your nail art to match the seasons. For example, incorporate fall-themed designs like leaves or pumpkins for an autumn touch.
Remember, nail art is all about personal expression, so feel free to mix and match these ideas or come up with your own unique creations. Whether you’re into subtle details or bold statements, combining nail art with brown ombre opens the door to endless possibilities for stylish and eye-catching nails.
Frequently Asked Questions
Are brown nails elegant?
Brown nude nails epitomize sophistication through their versatility, timeless appeal, subtle confidence, and adaptability to various occasions and skin tones. They are a choice that showcases a refined style and appreciation for elegance, making them a staple in the world of nails.
Is ombre nails gel or acrylic?
If you want to get really creative with your ombre nails, you can try using multiple colors or even adding glitter or other embellishments. Just make sure that the base color is dry before adding anything on top. You can achieve ombre nails with either acrylic or gel.
What color do you use for ombre nails?
This totally depends on your preference. For a classic French ombre, whites, creams and pinks work beautifully. For a gradient ombre, you could transition through one colour, with various shades (e.g. navy blue, mid blue and light blue).
What are ombre French nails called?
Sometimes called “baby boomer nails” as a tongue-in-cheek reference to the style’s popularity in the 1940s, or the “ombré French,” session manicurist Ami Streets describes the look as “a soft, sheer nude, or pink base color that smoothly transitions into a paler shade like cream or white at the tip.” Related Stories.
Can you do ombre with gel?
There are few ways to create ombre gel nails using manicure or makeup sponge. You can apply all nail polish to the sponge by painting colored stripes and then apply varnish from the sponge onto your nail. Make sure to cut the sponge to thin layers. It will minimize paint dirt on surrounding skin.
Hope you find these nails designs helpful, and use them to enhance your nail designs game.
Leave a comment and give us review about our nails designs.
Suggest out nail designs to your friends and people around to help them to elevate their nail designs game.
I’ve also written blogs on other Nail Designs that you might attractive. You can visit our site to see these Halloween French tip nails designs. And don’t forget to leave a review for us.
You can also follow us on Facebook at Short Nail Ideas.
Thanks.